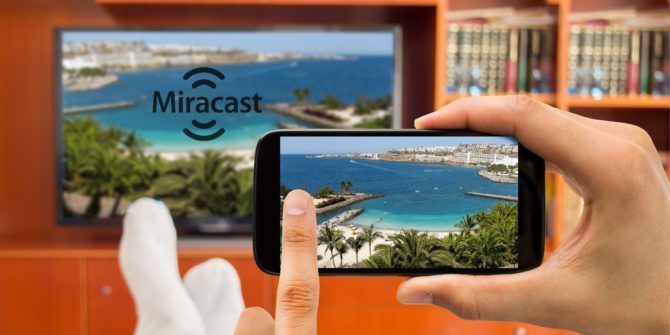
This article will show you how to set up and use Miracast to mirror or cast your computer screen to another screen which could be TV/Projector wirelessly. The whole process is very easy and quick to learn once. If you don’t know what is Miracast then keep reading or else you can jump to the steps directly down below
Miracast in nutshell
As per Wikipedia article:
“Miracast is a standard for wireless connections from devices to displays, introduced in 2012 by the Wi-Fi Alliance. It can roughly be described as “HDMI over Wi-Fi”, replacing the cable from the device to the display. The Wi-Fi Alliance launched the Miracast certification program at the end of 2012.”
Windows Operating system started giving Miracast support from Windows 8.1 version. So with Miracast, you can cast your computer screen to other monitors, TV or projector screen without any hassle. Miracast gives you opportunities to send videos in 1080p resolution with H.264 codec feature and 5.1 surround sound.
How To Check Your Device Miracast compatibility
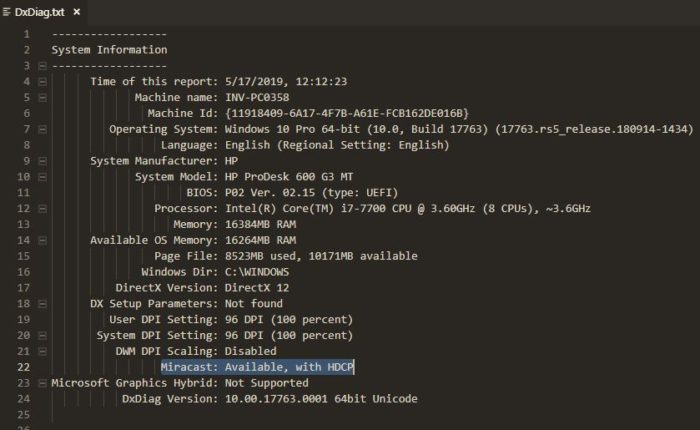
Step 1: Open Run command box (Windows + R) and type dxdiag command, then hit OK button to run it.
Step 2: Click Save all Information button on the first tab and save the file wherever you like.
Step 3: Open the file and search for Mircast as shown in the image below. If it shows Available then you are in luck to use Miracast with your computer.
How to Use Miracast on Windows 10
Here are the steps to use Mircast on Windows 10 to mirror your PC screen on another screen.
Step 1: Turn on the Miracast feature in your target screen if it has an in-built feature or else turns on the display adapter that you have attached to the screen via HDMI port.
Step 2: Open Settings on your computer and search for Device and choose the first option.
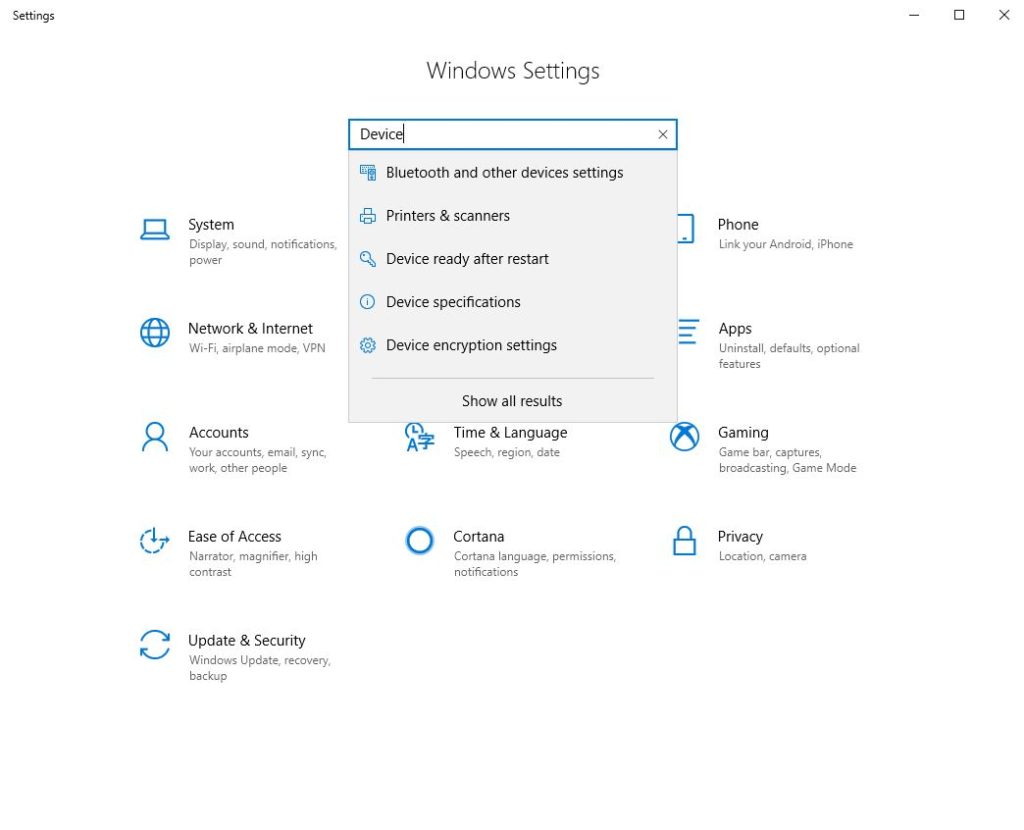
Note: Before it was Devices and now it is Bluetooth & Other devices, Microsoft keeps changing this setting name so be sure that you find a screen that allows you to add a device.
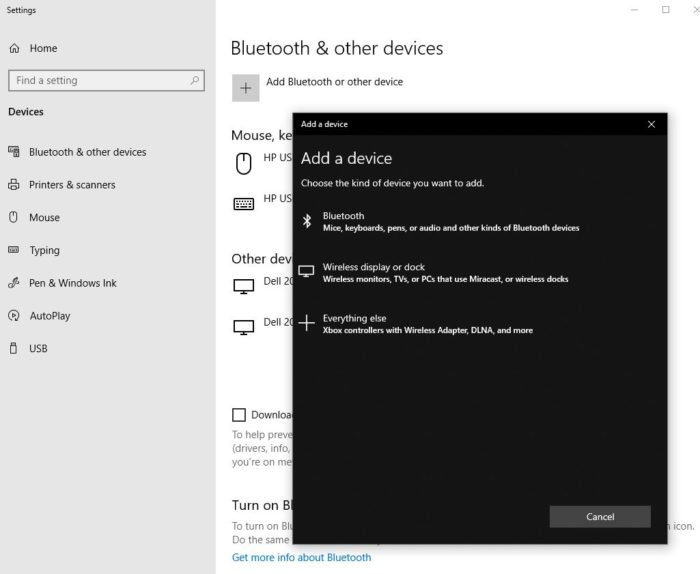
Step 3: Press Add a Device option and choose the Wireless display or dock option, from the list, choose your target screen or adapter name.
Step 4: To cast the screen press Windows + P and select the screen
Step 5: That’s it.
Just perform Step 4 every time you want to cast your screen to another display. We have mentioned a few tricks below that you can use if you are not getting any sound or Not supported error message when you try to use Miracast with Windows 10.
Common Solutions for Mircast issues with Window 10
- Update Device drivers
- Update WiFi drivers
- Check your computer compatibility with Wi-Fi Direct feature
- Use different Display Adapter like
Microsoft Wireless Display Adapter - Ask us in the comment section below
- Ask some expert near your location
Please let us know if you have any questions about this process in the comment section down below. We will be glad to hear from you and help you to resolve the issue.
Mine didn’t do anything after I pressed windows and P the project screen came up and there are four choices I picked one by left click once nothing happened to selected it. I left click it twice and it just highlights it and that’s it. What else do I do or what did I do wrong?
Did you check whether your device is Miracast compatible?
My PC is miracast compatible. However, when i try to connect it to my TV, my TV would prompt ‘unable to connect for screen share. Try again’ Both devices are on the same wifi network. It is an LG smart TV but somehow i can’t get both to connect. Much help would be appreciated. Thanks.
Have you tried updating device drivers as we have mentioned under “Common Solutions for Mircast issues with Window 10” section in the article?
I always follow your all articles.
Thanks a lot in advance for your effective answer !. Really nice posting.Excellent blogger, Thank you for publishing this great post. I found it handy. Best regards !!