Sometimes you might need to work on Pi without directly connecting to it through a remote control on another computer.
VNC – Virtual Network Computer, is a graphical desktop sharing system that allows you to remotely control the desktop of one computer from another.
This article will help you to setup VNC server on Raspberry Pi via Command line (terminal) so even if you are connected to your Pi via SSH then also you can use VNC server feature.

VNC helps you to see the desktop interface of the Raspberry Pi inside one window on your computer whether it is Windows or OS X. You will be able to control it as if you are working directly on the Pi itself. VNC transmits the mouse and keyboard events (actions) from the controller.
Follow the steps below to setup VNC server on Raspberry Pi via command line to control your Pi with your computer without any external keyboard or mouse.
Step 1: Install TightVNC on your Pi (using a monitor or via SSH) using the command given.
sudo apt-get install tightvncserver
Step 2: Run TightVNC Server which will ask to enter a password which is:
tightvncserver

Step 3: Start a VNC server from the terminal:
vncserver :1 -geometry 1920×1080 -depth 24
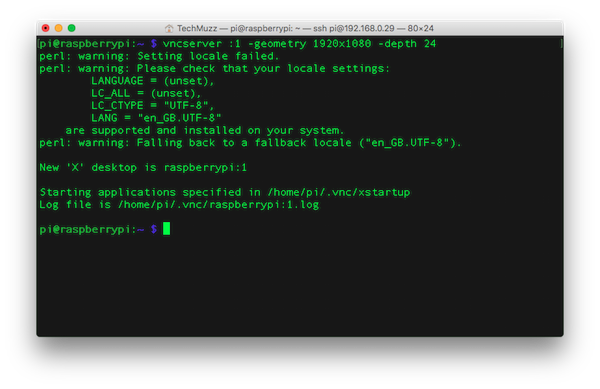
Note: By default, one session is already started at 0, so it will give you an error if you try to start a new session at 0.
Step 4: To save our resources we would close the session which we don’t need ( :0 ). You can stop the display manager running on 0 using the command given below.
service lightdm stop
Step 5: Install and run the VNC client on your remote computer. Through terminal of Linux you can install xtightvncviewer using :
sudo apt-get install xtightvncviewer
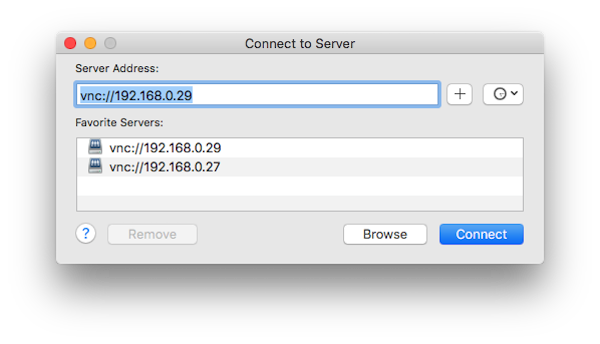
Otherwise, TightVNC is downloadable from tightvnc.com for Windows users. If you are OS X user you don’t need to install anything because you can open VNC session without any other TightVNC viewer. Hit below command in terminal:
open vnc://XXX.XXX.XXX.XXX (Replace XXX with correct IP address)
Alternatively, you can open Finder window and then select Go in the menubar and then Connect to server… or press Command + K to reach below box. Enter the same command in the server address and hit Connect which will ask you for a password. Enter the password that you have set while installing TightVNC on your Pi.
Note: If you are not able to connect to the server then you can try the session by below command and follow the step 3 to start the session again.
vncserver -kill :X (Replace X with correct number)
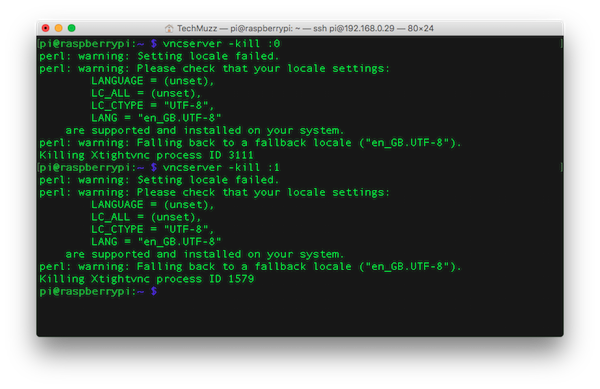
Note: If you want to kill all the session then try to kill them manually and then start an X session on :0 and try to connect to the server.
Step 6: That’s all.
If you have any query related to this article then feel free to ask in the comment section. We will be glad to help you.
Enjoy & Stay Techie…
Always discuss with my friends. They always appreciate your informative articles.
Thank you! It works!
thank you for helping me
Great content! thank you
Finally found u
Great content! thank you