So, you have bought your first Raspberry Pi, eh? I welcome you heartily to the community of IoT. Now you are all equipped to build or invent new tech gadget that would help you and others in their lives.
There is immense ocean of content online to start from. But, wait before everything you have to setup your Raspberry Pi in order to make it take and process your orders.
Headless Setup Raspberry Pi means to setup your Raspberry Pi without external display, mouse and keyboard. It is very easy process to setup it up in matter of time.
Note: If you have a Display monitor or TV with HDMI cable, keyboard and mouse then you don’t need this article.
In this article we assume that you have successfully loaded your SD card with either Raspbian or Noobs OS for Raspberry Pi. This article is written for those who don’t have a display / keyboard / mouse and want to have a headless setup for Raspberry Pi.
Don’t worry if you don’t have all the equipment, but you will need an Ethernet cable that is connected to a WiFi modem so you that you can connect to your Raspberry Pi wirelessly.
Follow the steps below to headless setup your Raspberry Pi. It is very easy and smooth trick to perform. So let’s get started.
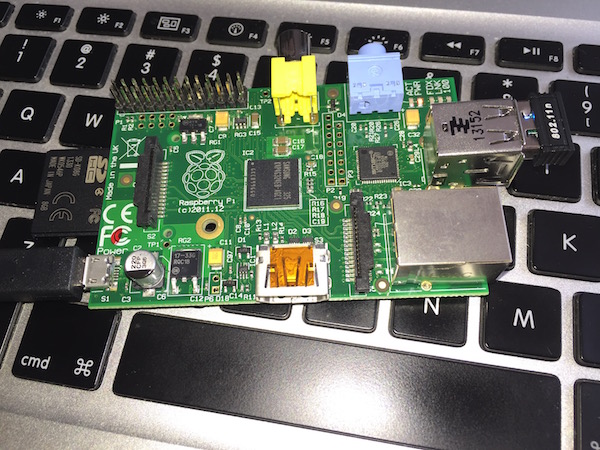
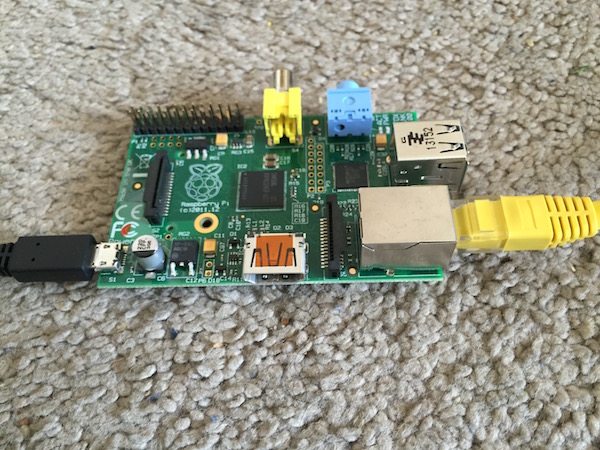
Step 1: Connect your SD card, Ethernet cable to your Raspberry Pi and then connect it to power supply. Wait for 60-90 seconds to let your Raspberry Pi load OS and get ready to connect with you.
For OS X Users
Step 1: Open Terminal on your OS X (Mac or Macbook) or Linux OS or Putty software in Windows computer.
Step 2: Enter the command given below in the Terminal to list all available network devices in your network.
arp -a
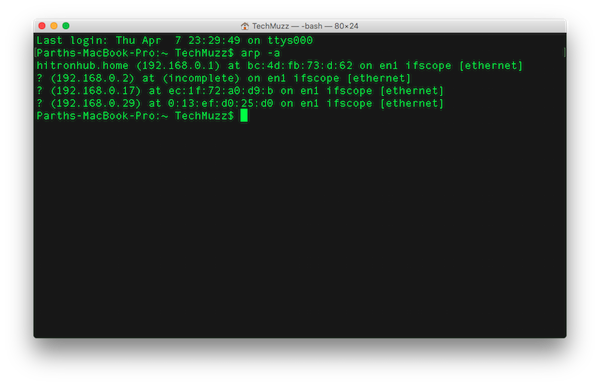
Step 3: Track your Raspberry Pi’s IP address by trying all anonymous IP addresses in the list. Do replace XXX.XXX.XXX.XXX with respective IP address of your Raspberry Pi.
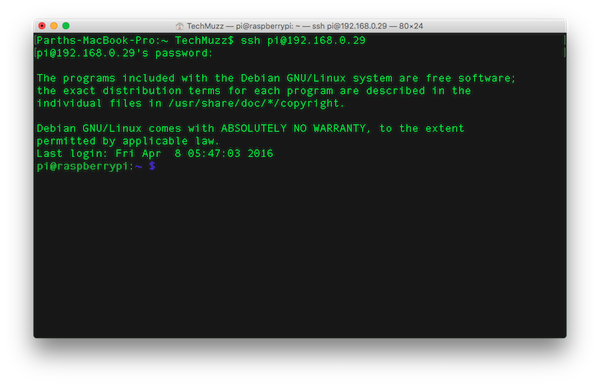
Step 4: If you would hit right IP address then it will ask for password which will be “raspberry” without quote obviously. You will be connected to your Raspberry PI if the IP address was correct or else you would need to try other IP address.
NOTE: It might take some time while it gets connected for the first time. This lag wouldn’t be there during other startups.
For Windows users (using Putty Software)
Step 1: Enter the IP address in the software and follow the on-screen instruction which will connect you to your Raspberry Pi.
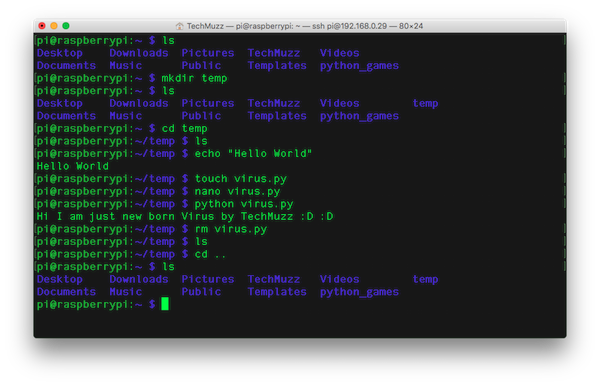
Step 2: Congratulations, you are now successfully connected to your Raspberry Pi which will look like below in your terminal and you can try basic Linux commands to check if it is working or not like ls, mkdir, etc.
That’s all. This is how you can headless setup Raspberry Pi without display or mouse or keyboard.
If you have any doubt or query related to this article then feel free to ask in the comment section. We will shortly make an article to setup Raspberry Pi with everything like display (TV or monitor), keyboard, mouse and will add link to this article so subscribe to our newsletter so could get the update.
We will also make new very cool and innovative gadgets with Raspberry Pi in short time so don’t forget to subscribe to our newsletter which you could do by providing your email address at the end of this page.
Thank You & Stay Techie…
Finally found u
This is a really good summary, thank you.
Thank you
Thank’s a lot man. God bless you
Great content! thank you
thank you very much
Thank’s a lot man. God bless you
real very good
It worked for me!! Thank you for the guide. Keep it up man.
Thank you! It works!