Using Ethernet cable to connect with the Internet is too old fashion and does not provide mobility. So the best option we have is to connect Raspberry Pi To WiFi network. This article will help you connect your Raspberry Pi to Wifi network via the command line in your Raspberry Pi. We assume you have already set up your Raspberry Pi, if not then visit this link if you want to headless setup Raspberry Pi in a matter of time.
This is a very easy trick and has only a few steps (commands). Let’s get you to familiarize with the whole process.
In this article, we will show you how you can get the list of the WiFi networks that you can connect your RaspberryPi too from the terminal only. After that, we will update one network configuration file in the RaspberryPi system files to allow it to connect automatically to the WPA network whenever it restarts without asking for the password every time. Please keep in mind that to if you don’t know the password of the network then this article won’t be able to help you to connect your RaspberryPi to the required WiFi network. Once you successfully update the file, RaspberryPi automatically would try to the network or else you can force the connection process by restarting the RaspberryPi if you don’t have enough patience.
So let’s get started.
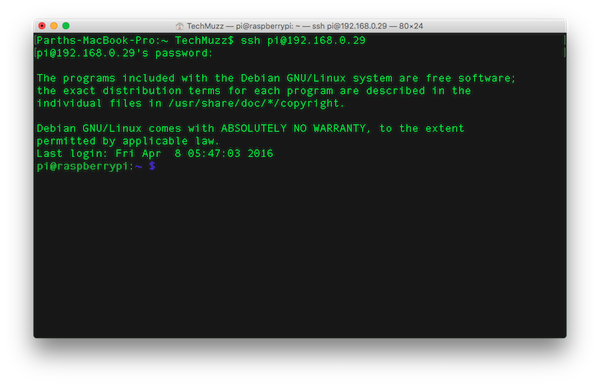
Step 1: Turn Raspberry Pi ON and start it’s terminal or any terminal which is connected to the Raspberry Pi (If you are using it headlessly).
Step 2: Enter the command given below in the command line to list all available WiFi networks to find your network’s ESSID.
sudo iwlist wlan0 scan
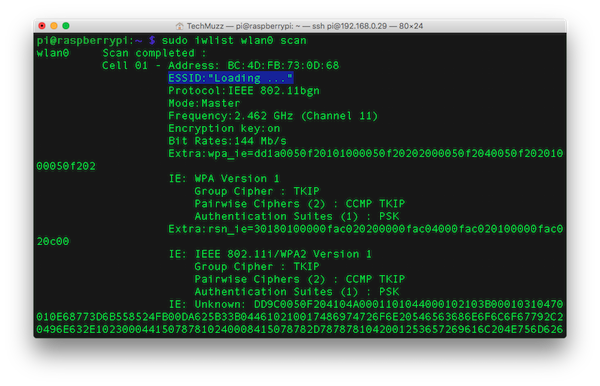
Step 3: Find or trace your network’s ESSID by find option in terminal or manually to copy it so there will be no chances of failure.
Step 4: Open the WPA-supplicant configuration file in nano.
sudo nano /etc/wpa_supplicant/wpa_supplicant.conf
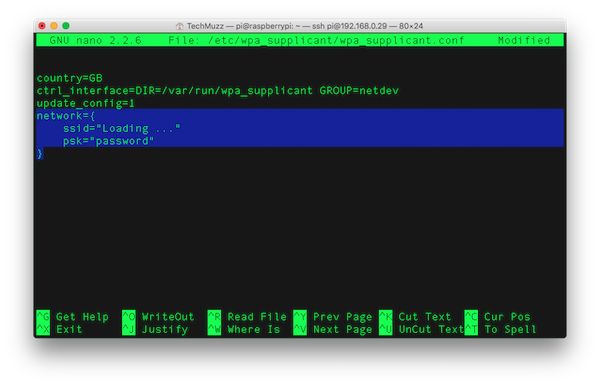
Step 5: Add the code given below at the end of the file with correct information.
network={
    ssid="testing"
    psk="testingPassword"
}
Step 6: Now press Ctrl + X Exit the File.
Step 7: It will ask to save the changes or not, Press Y to save the changes in the file. Then Hit Enter/Return.
Step 8: That’s all. Your work is over.
After a few seconds, the wpa-supplicant file will notice some changes have occurred so it will try to connect to the network.
NOTE: Don’t forget to attach WiFi Connector to your Raspberry Pi else it won’t be able to connect to WiFi.
If it is not getting connected and you want to force connect, then reboot your Raspberry Pi with sudo reboot command in the command line.
If Raspberry Pi is still not connected To WiFi network, check your password and ESSID are correct.
If you have any query related to this article then feel free to ask in the comment section. We will be glad to help you out.
Thank You & Stay Techie…
thank you very much
Thanks for sharing these wonderful list appreciate your great research. Please update your list. Looking forward for your next post.
real very good
Finally found u
Great, thank you so much. God bless!
Appreciated your approach to share technology related knowledge, and I feel these sharing are upto a considerable standard. Thank you
I always follow your all articles.
Finally found u
Always discuss with my friends. They always appreciate your informative articles.
Thank you
Thanks for this article.
This is a really good summary, thank you.
Great content! thank you
Appreciated your approach to share technology related knowledge, and I feel these sharing are upto a considerable standard. Thank you
Very useful information.Thanks.
nice work !!!!!!
Always discuss with my friends. They always appreciate your informative articles.
I appreciate you helping me learn more about the topic.
I appreciate you helping me learn more about the topic.
Thank you
Great, thank you so much. God bless!
nice work !!!!!!
thank you very much