Sometimes it happens that we know the pro stuff about the things but don’t know the basic ones. Like we know how to use iOS on Mac or MacBook very well but we don’t know how to resize image in iOS. But as they say “There is always first time”. Right?
So to overcome your problem, this tutorial will teach you how to resize an image by Preview app in iOS.
You don’t have to install the app as it comes as default app. It is an easy task to do but the options are placed in such manner that we could miss to check them out. Let’s start our tutorial…
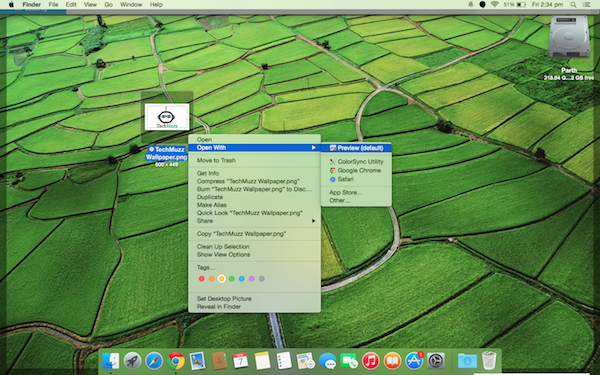
Step 1: Navigate to your image and right click on it. Then navigate to option as “Open With>Preview”.
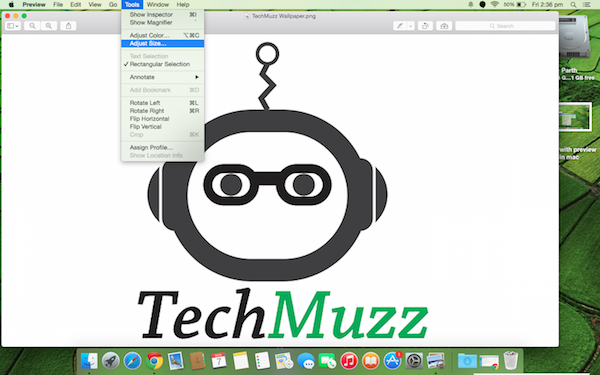
Step 2: The above step will open your image in the “Preview” app. Now go Tools option menu which is listed in the top bar and click on the “Adjust Size” option.
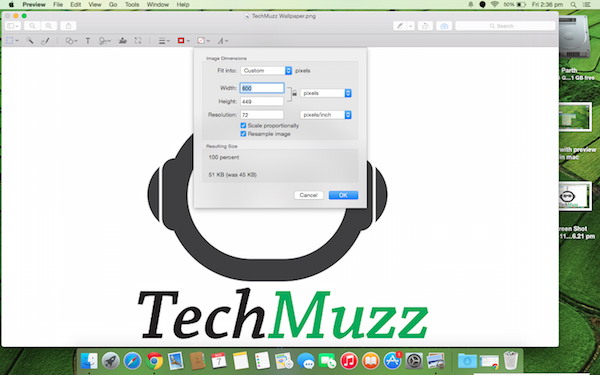
Step 3: There you can adjust the size convenient to your needs.
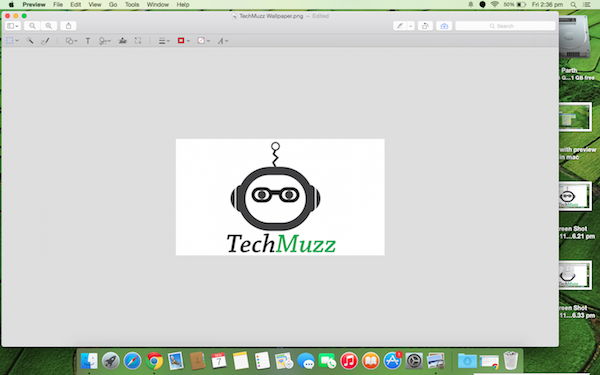
Step 4: Now Save your file. This will save the image with new size.
Most probably the Mac users forget to check the options in the top toolbar and face the hurdles. If you find any problem feel free to ask.
We will be glad to solve your queries.
Enjoy and Stay Techie…