As a blogger or owner of a website, you have a custom email address through which your clients or visitors can contact you easily. But we all know that we have to handle so many email accounts, so when the website’s custom email address is added to the list it increases the workload. It comes with its own rules and data. We have to remember its username and password.
Even though if we want to check the mails in custom email address we can’t access them from our regular email client like Gmail, Yahoo mail, etc. Think about that, there is a solution of our problems which can connect our custom email address to our regular and free email client. It becomes more convenient right?
In this tutorial you will learn how to add your custom email address to your Gmail Account.
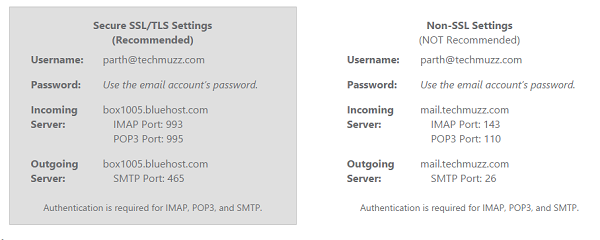
For this tutorial you require your username, password and hosting details.
Step 1: Collect data from your website’s control panel or ask your hosting provider to send you data shown below:
Step 2: Now Go to your Gmail account’s setting page and navigate to Accounts and Imports tab. Then click on the “Add a POP3 mail account you own” option which is highlighted in the image below.

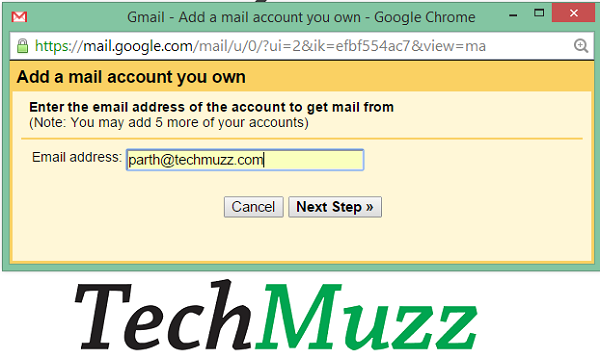
Step 3: Add your custom email address in input box.
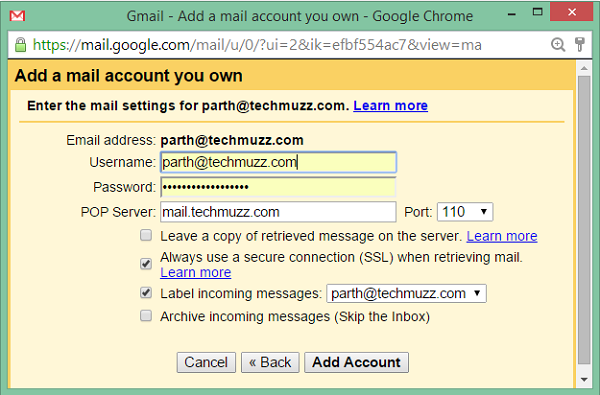
Step 4: Again add your custom email address with password. Then check the option which you find more useful to you. Then Click Add Account.
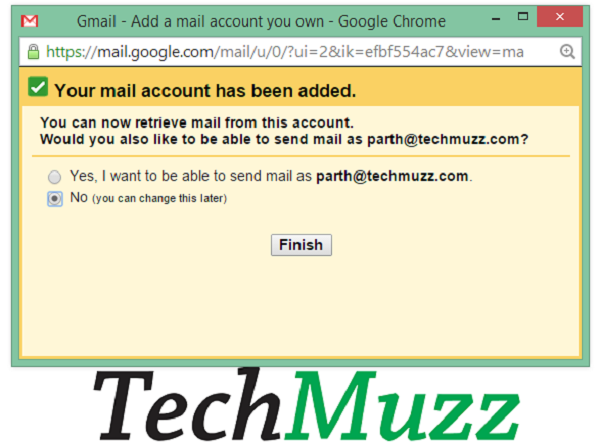
Step 5: In next window you will be asked if Would you also like to be able to send mail as custom email address?. If you want to do so then check yes or else select second option.
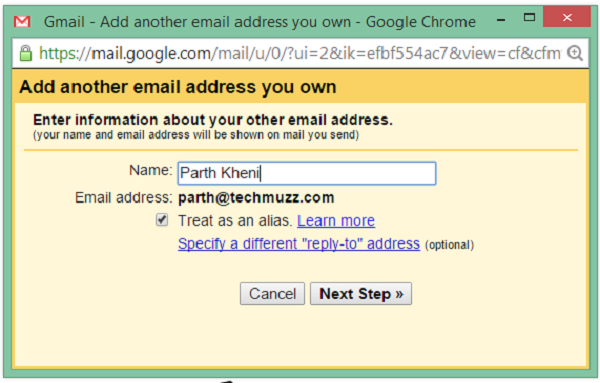
Step 6: If you selected Yes option in above step then in Next Step they will ask a name which will set as default name for that mail address. Enter your name and click on Next Step Button.
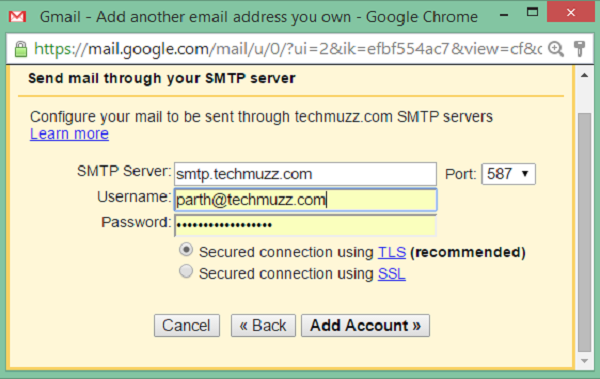
Step 7: In Next Step you have to enter your username and password again to authenticate yourself for sending mails by the custom email address. Click on Add Account Button.
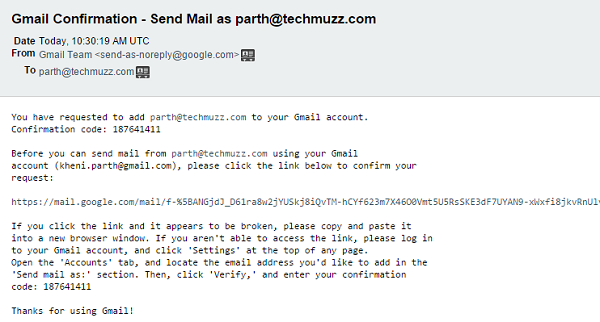
Step 8: Now you have to verify your account. For that you have to login to your custom email account and click on the link which Gmail has sent you to verify yourself.
Step 9: That’s it.Go to Gmail Account’s setting and then in Accounts and Imports tag where you find that your custom email is not listed. Click on the “Check mail now” option to fetch mail from your custom mail address.
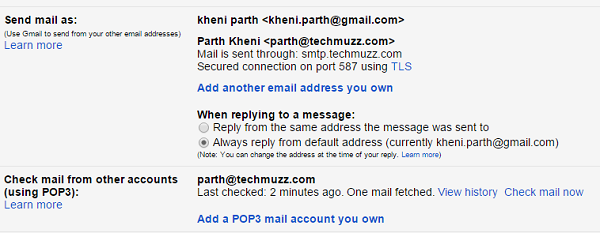
Now you will get mails in your Gmail Account whenever your custom email address gets mail and you can also send mails from your same Gmail account. For that you have to select sender whenever you send mail to someone.
If you find any problem to perform tasks given above, then feel free to ask in comment section below.
Enjoy and Stay Techie…
Cool, thanks
Cool, thanks
Thank’s a lot man. God bless you
thank you for helping me
help a lot, thanks
Thank’s a lot man. God bless you