As you have might already read somewhere online that everybody is so excited about this new IP address 1.1.1.1. It is also known as DNS (Domain Name System). This articles will help you to understand what it is and why it is beneficial for you to speed up your internet speed.
What is 1.1.1.1?
1.1.1.1 is a fast and private way to browse the Internet. It is a public DNS resolver, but unlike most DNS resolvers, 1.1.1.1 is not selling user data to advertisers. The implementation of 1.1.1.1 makes it the fastest resolver out there.
CloudFlare.com
What the heck is DNS?

The Domain Name System (DNS) is kind of a phonebook of the Internet. Humans can remember website or domain addresses easily if they are in textual form but if they are just a combination of numbers then it will be too much harder to remember more than 5 addresses. All web browsers use Internet Protocol (IP) addresses to access web pages. So DNS job is to translate domain name like www.techmuzz.comto its IP address69.195.124.205.
If you want to know more about CloudFlare, DNS, DNS resolver then just navigate to this page which will explain all your doubts.
Why this new DNS address?
Most probably you will be using a default the DNS provided by your Internet service provider. If they might have thought to use better DNS then they would have configured your Modem to use Google’s DNS that is faster then average ISP.
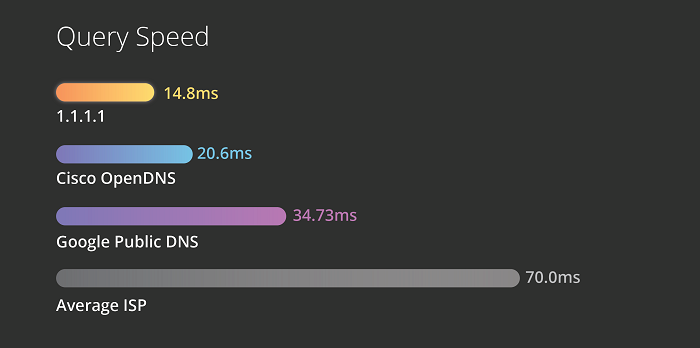
But This new DNS provided by CloudFlare has the power of the CloudFlare network that gives 1.1.1.1 a natural advantage in the terms of delivering speedy DNS queries resulting in boosting your internet speed. CloudFlare’s network has over 7 million domains, making queries for those domains will be lightning-fast then other DNS as shown in the image above.
How to Get it without any hassle?
Follow the respective steps mentioned below for the devices that you want to install this new DNS.
Windows
For Windows computer or laptop please follow these steps:
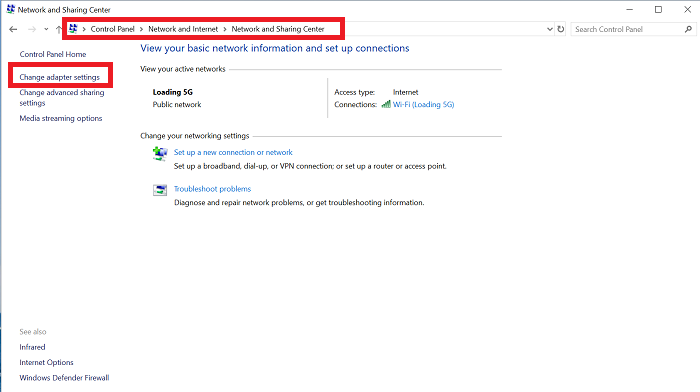
Step 1: Click on the Start menu, then open Control Panel.
Step 2: Click on Network and Internet, then Network and Sharing Center.
Step 3: Click on Change Adapter Settings.
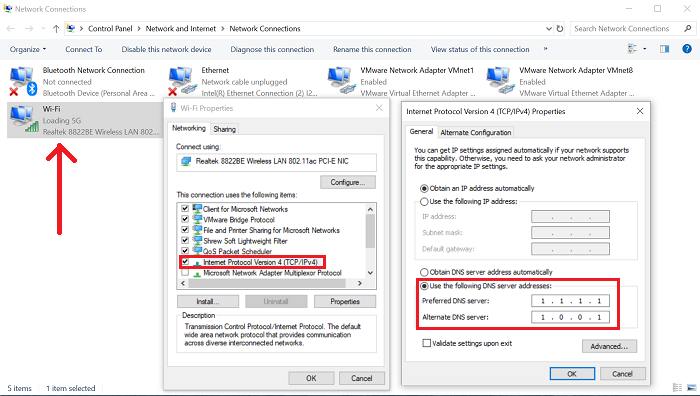
Step 4: Right click on the Wi-Fi network that your currently connected to, click Properties afterwards.
Step 5: Select either Internet Protocol Version 4 or Version 6 (if you use IPv6), then click Properties.
Step 6: Write your current DNS settings somewhere safe for future reference if you want to switch back to for some reasons..
Step 7: Click Use The Following DNS Server Addresses radion button and replace those addresses with:
- For IPv4: 1.1.1.1 and 1.0.0.1
- For IPv6: 2606:4700:4700::1111 and 2606:4700:4700::1001
Step 8: Click OK, then Close. Restart your browser.
Note: You will have to restart your browser if you have opened any to affect this changes.
Step 9: That’s it
Mac OS
Please follow these steps to update your DNS setting in MacBook or Mac.
Step 1: Open System Preferences.
Step 2: Search for DNS Servers and open it from the drop down menu or Choose Network > Advanced > DNS.
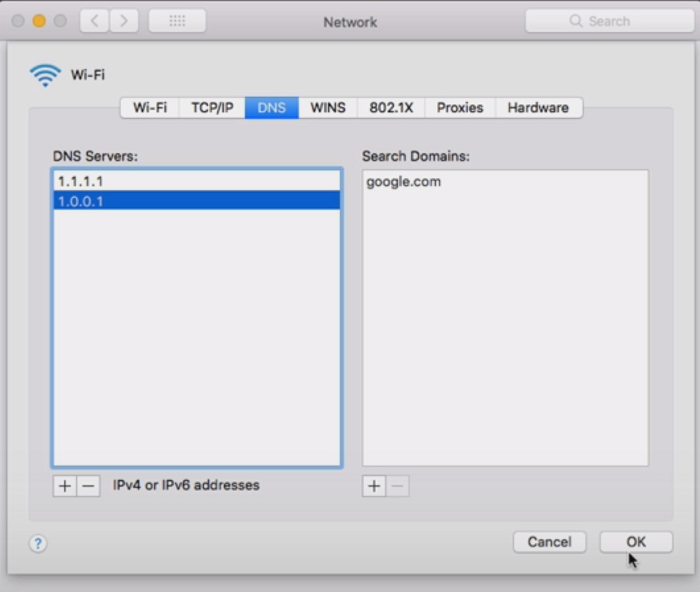
Step 3: Click the + and enter below values one by one
- 1.1.1.1
- 1.0.0.1
- 2606:4700:4700::1111
- 2606:4700:4700::1001
Note: Only 1.1.1.1 is required rest of the three are for redundancy.
Step 4: Click Ok, then Apply.
Step 5: That’s it
Note: Please restart any opened web browser to affect this changes.
SmartPhones (Android / iPhone)
Just follow these simple steps to set it up on your smartphones very easily.
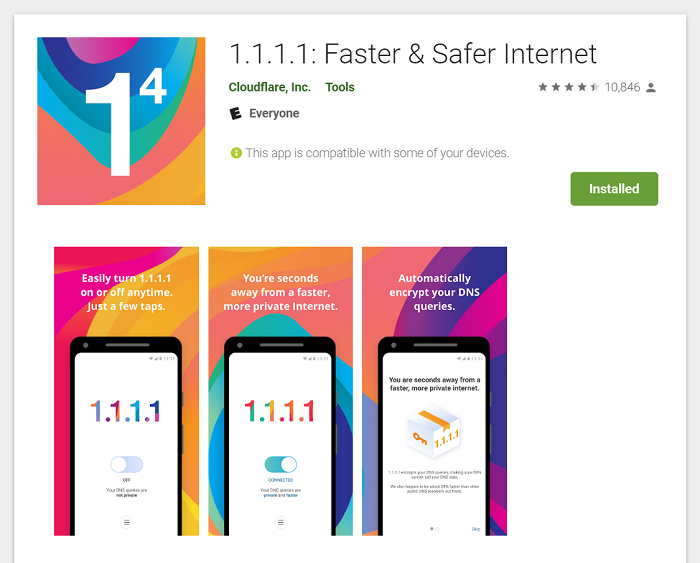
Step 1: Navigate to https://1.1.1.1/ & Choose your operating system’s App store. For demo purposes, we have chosen Android OS for this article
Step 2: Download the app, this app is provided by CloudFlare only
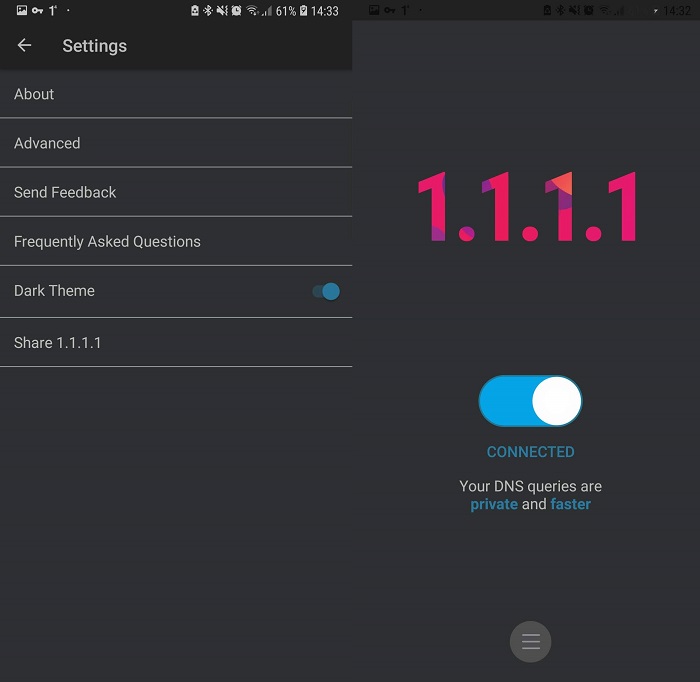
Step 3: Open the App and install the VPN profile
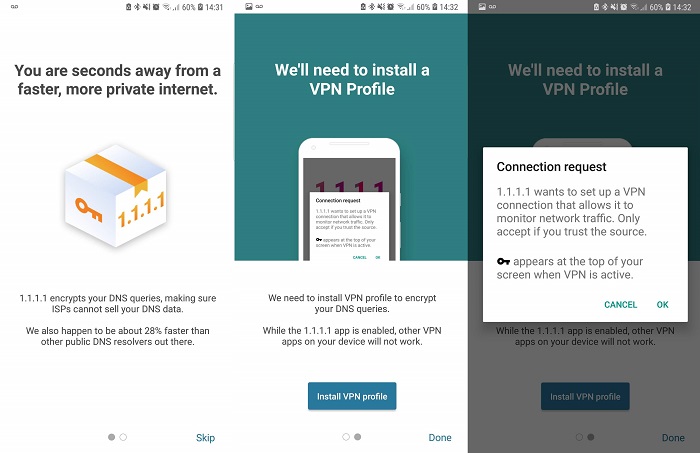
Note: As mentioned in the image, unfortunately, you will not be able to use other VPN services if you want to set up the DNS this way. This VPN profile will tunnel all your queries through CloudFlare’s DNS (1.1.1.1) for you.
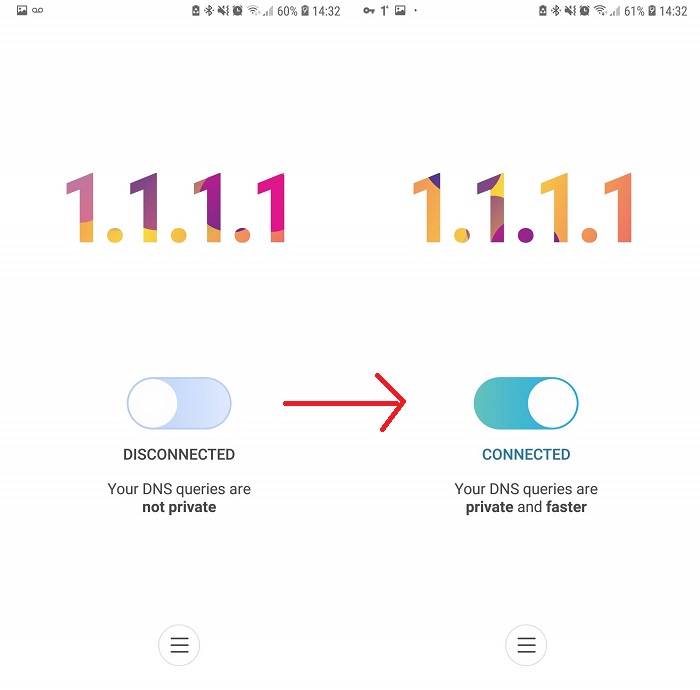
Step 4: Now just Toggle On the switch in the center as shown in the image.
Step 5: That’s it
If you more inclined towards using a black or dark theme then choose the hamburger menu in the screen located at the bottom and choose Dark Theme option from the list.
Please let us know your experience after switching to this new DNS. If you have any questions about this article then also reach out us in the comment section below. We will be glad to help you.
Thank you & Stay Techie…
Very useful information.Thanks.